TVR Griffith
This information has been gathered from personal experience and is believed to be accurate but there is no guarantee that this is the case. Anyone using this information does so on the understanding that its use is completely at their own risk and that no liability for errors or ommisions or consequential damage to persons or possessions will be accepted by the author or his agents. Prospective users should make their own considered judgement or seek specialist advice as to the accuracy or otherwise of any statements made before using this information in anyway
This information has been gathered from personal experience and is believed to be accurate but there is no guarantee that this is the case. Anyone using this information does so on the understanding that its use is completely at their own risk and that no liability for errors or ommisions or consequential damage to persons or possessions will be accepted by the author or his agents. Prospective users should make their own considered judgement or seek specialist advice as to the accuracy or otherwise of any statements made before using this information in anyway
Wheel Alignment
The front wishbones were rusting quite badly so I decided to remove them and repaint. Before dismantling, the positions of the ball joints etc. were carefully marked so as not to disturb the wheel alignment. After de-rusting with a rotary wire brush, rust remover was applied and the clean metal was primed with Galvafroid galvanised paint and then top coated with Smoothrite. It seemed sensible to also replace all the bushes and ball joints at the same time. So as to maintain the same wheel alignment I had carefully marked the position of the old ball joints and fitted new. The car semed to drive OK and so I thought no more about it until a recent pre MOT check revealed the abnormal wear to both tyres, the offside shown below:
The front wishbones were rusting quite badly so I decided to remove them and repaint. Before dismantling, the positions of the ball joints etc. were carefully marked so as not to disturb the wheel alignment. After de-rusting with a rotary wire brush, rust remover was applied and the clean metal was primed with Galvafroid galvanised paint and then top coated with Smoothrite. It seemed sensible to also replace all the bushes and ball joints at the same time. So as to maintain the same wheel alignment I had carefully marked the position of the old ball joints and fitted new. The car semed to drive OK and so I thought no more about it until a recent pre MOT check revealed the abnormal wear to both tyres, the offside shown below:
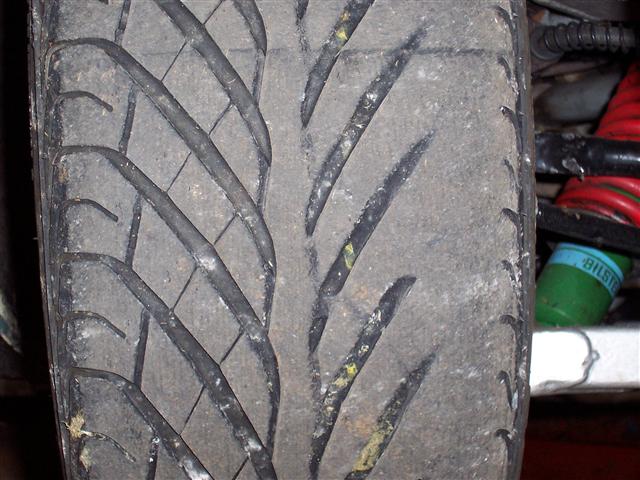
Checking the Toe, the wheels were found to be Toeing out, not in, by a significant amount. The Camber had also increased from Negative 1 to 2 degrees. As the new ball joints were in the same position as previously there must be a subtle diffference in their construction that altered the Toe-in and Camber. The result illustrated here and after about 800 miles, so the wear is fairly rapid. The tyres were already half worn (about 4mm ) so not the end of
the world but it does emphasise the necessity of checking both Camber and Toe after any alterations or replacements to the suspension. The cost of realigning your suspension will be significantly less than two new tyres!