TVR Griffith Electric Windows
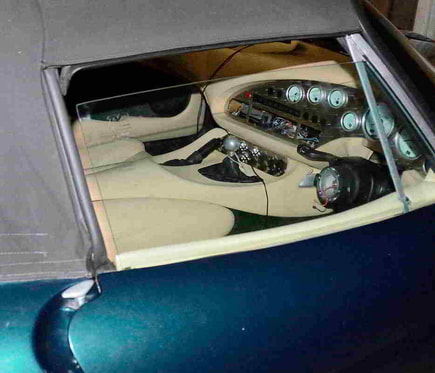
Griffith drivers window
|
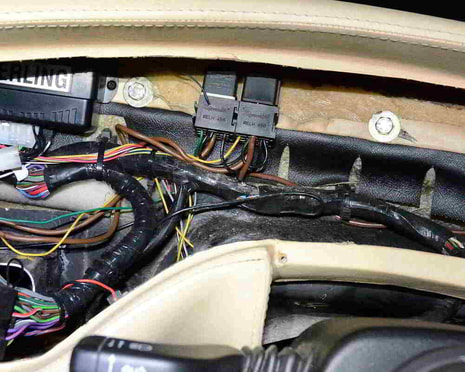
The two new relays on the bulkhead
|
The TVR Griffith and Chimera electric windows are notorious for their lethargic action and over the years several owners have made improvements to improve them. A first step is to check that the felt guides within the aluminium frame are in good condition, that the aluminium frame is not bent and it is fixed securely to the door. Some improvement can be gained by lubricating the felt channels with silicon grease but if they have worn through to the rubber backing they need replacing. At least one owner has found that oiling the lift motor improved things, but not all motors are accessible. One owner of a year 2000 car found that replacing the felt guides and realigning the guides and motor cured the problem but maybe the wiring guage on later cars was increased.
A reasonable check to see if the frames, felt channels etc are servicable is to watch the window opening, as gravity is assisting it to drop, if the window travels down smoothly and takes about 5 seconds to reach the bottom then one can assume the mechanical side is satisfactory. It is closing the window against gravity where the problems are most likely to occur mine took over 11 seconds and struggled. Colder weather especially below freezing also slows things somewhat. Many years ago some owners found that the voltage reaching the lift motors was well below the 12 volts required so I decided to investigate.
During lifting, the window motor voltage dropped to around 8 volts suggesting that the wiring was not sufficient to maintain an adequate current. A simple test by connecting battery +12 volts direct to the motor made a vast improvement and the window closed in under 5 seconds, perfectly adequate. With the original wiring, opening the window also takes around 5 seconds to complete so this does not require any modification.
A new +12 volt supply is needed to drive the lift motor during closing and a convenient take off point is available on the relay/fuse panel. The twin main 12 volt feeds from the battery ( via a 50Amp fuse) plug into the panel via two large spade terminals as shown below left:
+12 volt tags on the relay/fuse block
|
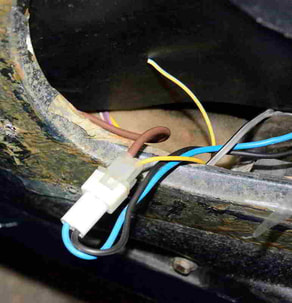
Lift motor plug/socket RH side
|
Fortunately there is an adjacent spare tag so this may be used for the new +12volt supply. As a precaution this new 12 volt supply should be fused, an inline fuse holder being convenient fitted with a 30 Amp fuse. A simple relay circuit will enable this new 12 volt supply to feed the lift motor when closing but will switch to the existing wiring for opening as this is quite sufficient, the circuit is seen below:
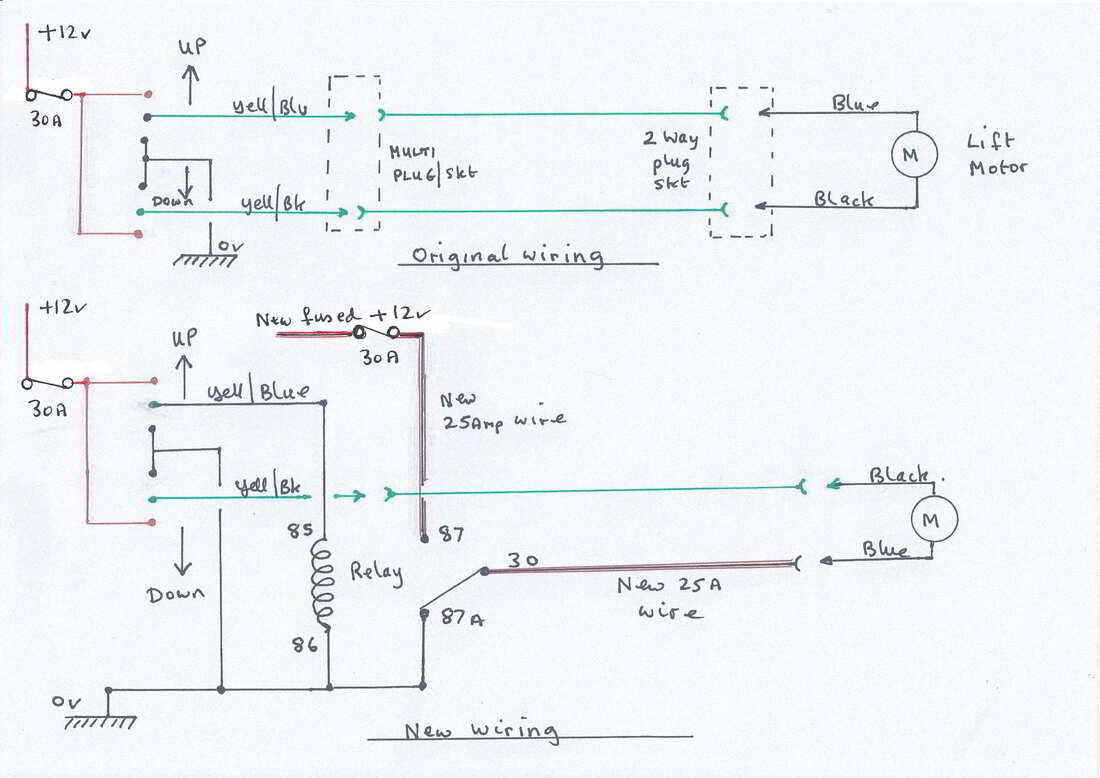
Relay operation
When the RH window switch is pushed forward to close the window The yellow/black wire has 0 volts and the the yellow/blue wire + 12 volts this causes the relay to change contacts, +12 volts direct from the battery ( via the relay/fuse block) is then routed to the RH window motor causing it to close efficiently. When the window switch is pulled back 0 Volts is then fed to the relay via the yellow/blue wire and + 12 volts is routed via Yellow black and the relay drops out. In doing so it connects the window motor Yellow/blue wire to earth or 0 volts but + 12 volts is now routed via yellow/black to the other motor terminal so it reverses and opens the window.
Procedure
Unfortunately this modification requires both the dashboard and the door cards to be removed not two of the easiest jobs. Advice is freely available on PistonHeads for both of these chores. The wiring feeding the lift motor is shown above right ( Black and light blue wires) and being the right hand door the two relevant wires from the window switches are coloured yellow/blue and yellow/black. Depending whether the window is opening or closing then the polarity on these wires reverses. In my case the yellow/blue wire was +12 volts when closing the window so this requires removing from the 2 way motor socket and a heavier guage wire inserted. The " Mate-N-Lock" socket insert can be removed either with the correct tool or by grasping the socket with snipe nosed pliers and it can then be drawn forward out of the plastic holder. New "Mate-N-Lock" socket inserts will be required available from electrical suppliers e.g. Polevolt Heavier guage wire is run from the socket back through the door and body grommets to behind the dash board. I used 2.5mm square (25 Amp) standard wire as this was to hand but 2mm ( 25 Amps) thin wall cable would be suitable.
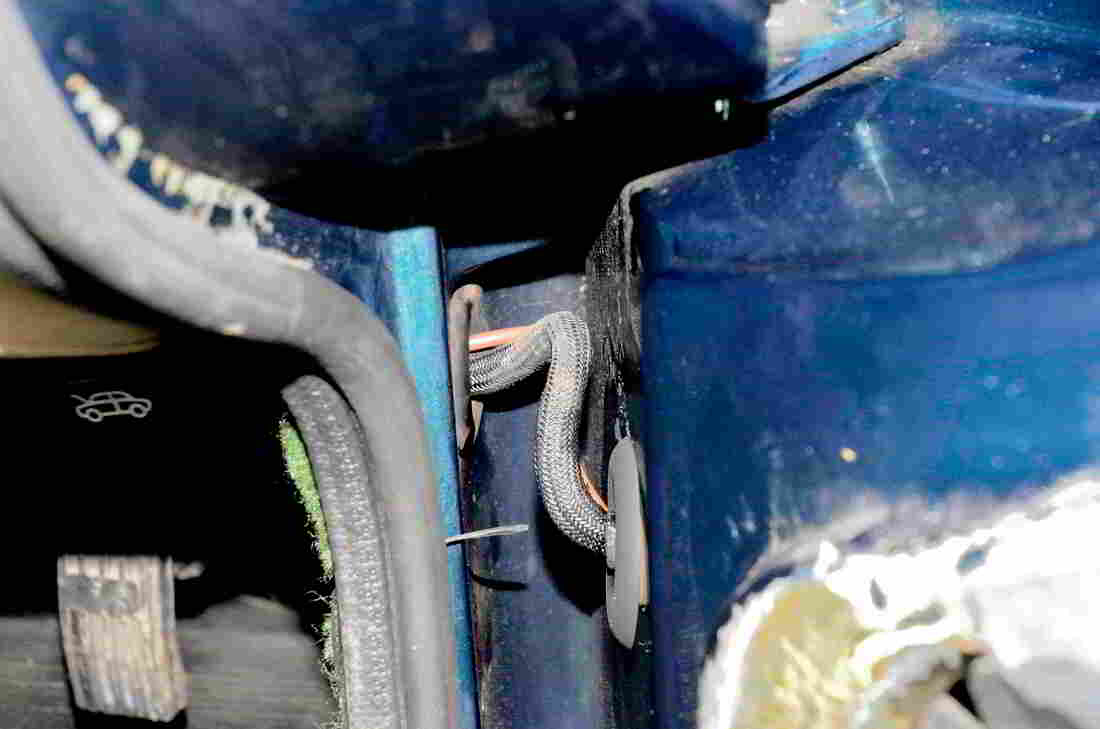
The new 12 volt supply to the door
|
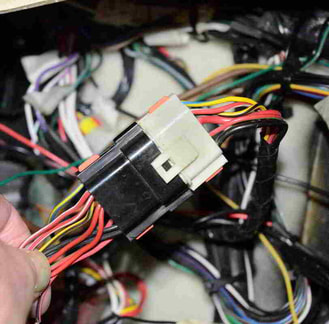
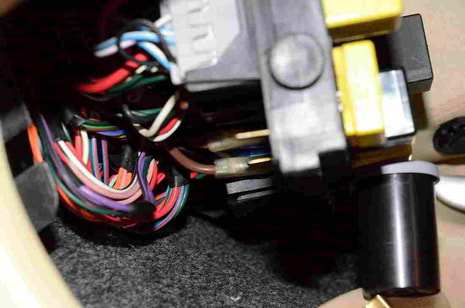
The control panel plug/socket
|
The wires from the window switch on the contol panel need to be traced, (yellow/blue and yellow/black) and appear on a multiway plug/socket behind the dash shown above right. For the RH window the yellow/blue wire needs to be cut before it enters the black plug and a new wire ( just normal size) soldered to it to feed the relevant relay, two of the relay connections require an earth (Black wires ) many earths are to be found behind the dash . Two standard 25 Amp changeover relays are needed one for each window type, 30Amp CO these may be conveniently mounted on the bulkhead as seen in the initial top right photo. The procedure needs to be repeated for the LH window. The LH window switch and lift motor are wired with red/black and red/green wires again terminating on the same multi way plug/socket behind the dash and on the two way connector in the door. Likewise the red/black wire is +12 volts when closing the window so needs to be cut at both locations. As loom wire colours could differ on other models the lift motor's blue wire is fed +12 volts to close the window on both windows so it is the wire in the mating 2 pin socket that connects to blue that requires replacing.
Supplier: Polevolt
A few tips
To access the window channels it is necessary to remove the polythene vapour barrier stretched over the door aperture. As polythene bags are now not as common as a few years ago it may prove difficult to find a suitable replacement. Stretch food film looks ideal and is in roll form so would span the gap but unfortunately it is not strong enough and would most likely break while fitting. I found that ordinary black dustbin bags could be cut to size and are of the desired strength, Spray on glue as used in uphostery etc. is ideal to stick it to the frame.
While removing or refitting the door panels access to the three 10mm fixing nuts and washers is not easy and either the nuts or the washers usually drop inside the door, one of these is perfect for retrieving dropped fixings:
Flexible Metre Long Magnetic Pickup Tool (frost.co.uk)
In fact it is an invaluable workshop tool for retrieving dropped bolts, spanners, pliers, screwdrivers etc. in the engine bay or elsewhere.