TVR Griffith
This information has been gathered from personal experience and is believed to be correct but there is no guarantee that this is the case. Anyone using this information does so on the understanding that its use is completely at their own risk and that no liability for errors, omissions or consequential damage to persons or possessions will be accepted by the author or his agents. Prospective users should make their own considered judgement or seek specialist advice as to the accuracy or otherwise of any statements made before using this information in any way.
This information has been gathered from personal experience and is believed to be correct but there is no guarantee that this is the case. Anyone using this information does so on the understanding that its use is completely at their own risk and that no liability for errors, omissions or consequential damage to persons or possessions will be accepted by the author or his agents. Prospective users should make their own considered judgement or seek specialist advice as to the accuracy or otherwise of any statements made before using this information in any way.
Dash Improvements
I have thought for a while now that TVR's methods of fixing both the dash to the body and the switch gear to the dash are not amongst their finest moments. Having experienced the glued on switches fail for a second time I decided to look for a better way. My original veneered dash was in a poor state so a replacement stainless engine turned finish dash was installed as a practical alternative. I do prefer the appearance of the wood (plastic) veneer especially in a green car but thought that for an open car SS would be much more durable. Following TVR's practice I glued both switch panels and the LED indicators straight onto the SS panel. This lasted about 2 years until the switches became detached. Another shortcoming on my car was the fact that the dash moved inwards slightly every time a button was pressed, as the panel is only secured by two self tappers above the steering wheel and a wing nut/washer on the extreme left-hand side this is not really surprising. I decided that the switches or rather the steel frames supporting the switches required bolting to the dash. The LEDs are not subject to any stresses and have never caused a problem so could remain glued. If they ever loosened the rather smart screw in matt silver type could be fitted. I had retained the old mild steel dash so had the idea of re-using this as the main support with the stainless panel as an escucheon finishing panel on top. By using countersunk 2 BA bolts in the main mild steel dash these would support the switches adequately, while the stainless panel would conceal them from view. Of course the escutcheon panel could be Carbon Fibre, Veneer or whatever. In addition, to make the dash more secure I also added two more fixings to the main dash, a lug to locate the top and a wing-nut/washer to secure the bottom:
The old mild steel dash
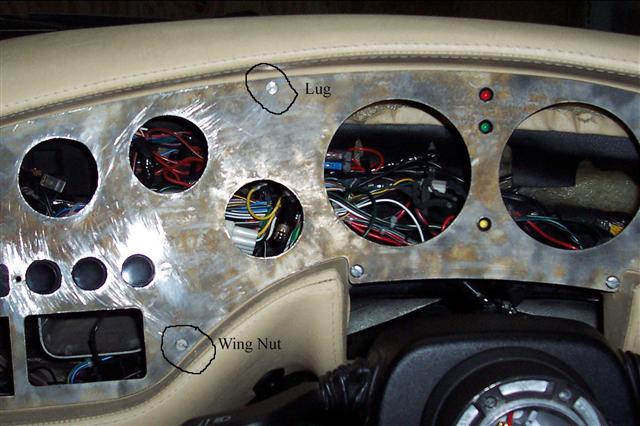
This shows the original mild steel dash secured with the two original self tappers above the steering column and the two new fixings. These additional minimise flexing while operating the push buttons. New countersunk bolts can be seen securing the switch bank.
Lug to Secure the Dash Top
Lug to Secure the Dash Top
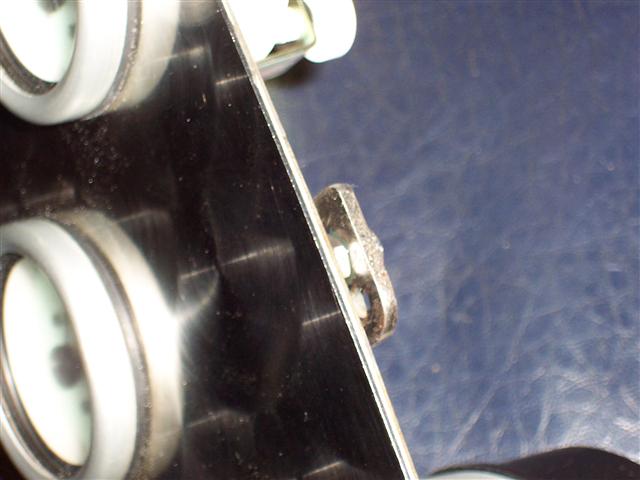
The Lug is simply a bit of 1/8" steel , drilled to locate on a 2 BA countersunk bolt. The lug is mounted just proud of the panel and is spaced by a nut so as to locate under the fibreglass dash surround.
The Wing Nut and Washer to secure the bottom of the Dash
The Wing Nut and Washer to secure the bottom of the Dash
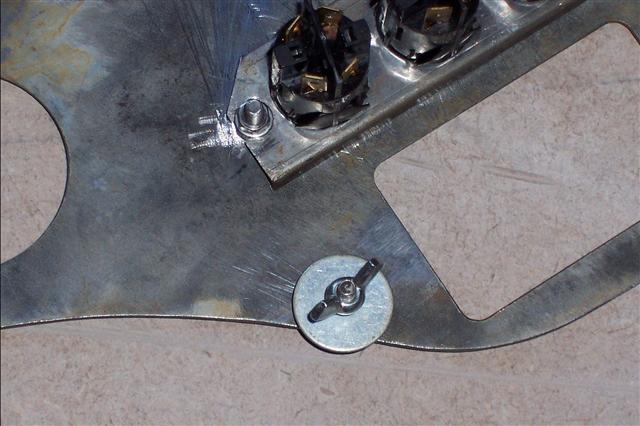
The old mild steel dash had to be drilled and countersunk to accept the 2 BA contersunk bolts and some relieving of the button holes was necessary to allow clearance in the new stainless top panel , this was required as the two panels though very close were not identical in size. The instrument holes were however all spot on. The switch brackets may also need a small amount of filing to align accurately. Not forgetting that the dash assumes a dished profile when mounted so this needs to be allowed for when aligning switches etc. All countersunk bolts were secured with 2 BA nuts to the old panel and washers used to level the switch brackets. Loctite was applied to ensure that they remained tight, as when covered the bolt heads would be innaccessible. When everything appeared to fit, the two panels were glued and cramped using Araldite. Instruments were fitted and the assembly manouvred into position. Inaddition to bowing it slightly the upper fibre glass dash surround can be eased upward to allow the lug to locate under the rim. There are now two wing nut/washers to be tightened and the two self tapping screws. The whole set up feels much more stable and business like and hopefully solves the problem.